
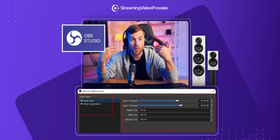
How To Get The Most Out Of OBS Noise Gate And Sound Suppression
If you’ve ever streamed before, you know how frustrating unwanted background noise and bad sound levels can be. Many streamers focus on video settings and flashy OBS widgets but configuring OBS noise gate is often overlooked.
Here are some quick tips to dramatically improve your microphone quality by optimizing your settings correctly within OBS.
Improving OBS mic and audio quality
Luckily, there are some easy steps you can follow to ensure your audio quality isn’t letting you (or your viewers) down. Many of these settings relate to your microphone and how sensitive it is to picking up sounds.
Equipment and Placement
When buying a microphone, you need to figure out which microphone type is best for your content. The common types of microphones for streaming are either condenser microphones or dynamic microphones.
If you’re looking to find the best streaming equipment, the key is to find a balance between price and quality. A great choice would be something like the Blue Yeti. This is a side-address condenser microphone that connects via USB. It is easy to connect to your computer, and it works great when you are using it directly in front of you.
Another factor you to consider is choosing the microphone with the right polar pattern. Some polar patterns are more susceptible to picking up background noise than others, and this is something to keep in mind.
Most beginners opt for a typical cardioid polar pattern as they are using the mic directly in front of them. Cardioid mics will assist with removing unwanted sounds from your environment.
It is also important to place your microphone the correct distance away from you. Most people get optimal results with the mic between 6 and 12 inches away.
Investing in good accessories like a pop shield and shock mounts can also improve the sound because it reduces ‘popping’ sounds. In any case, stabilizing the microphone for a consistent capture should be your goal.
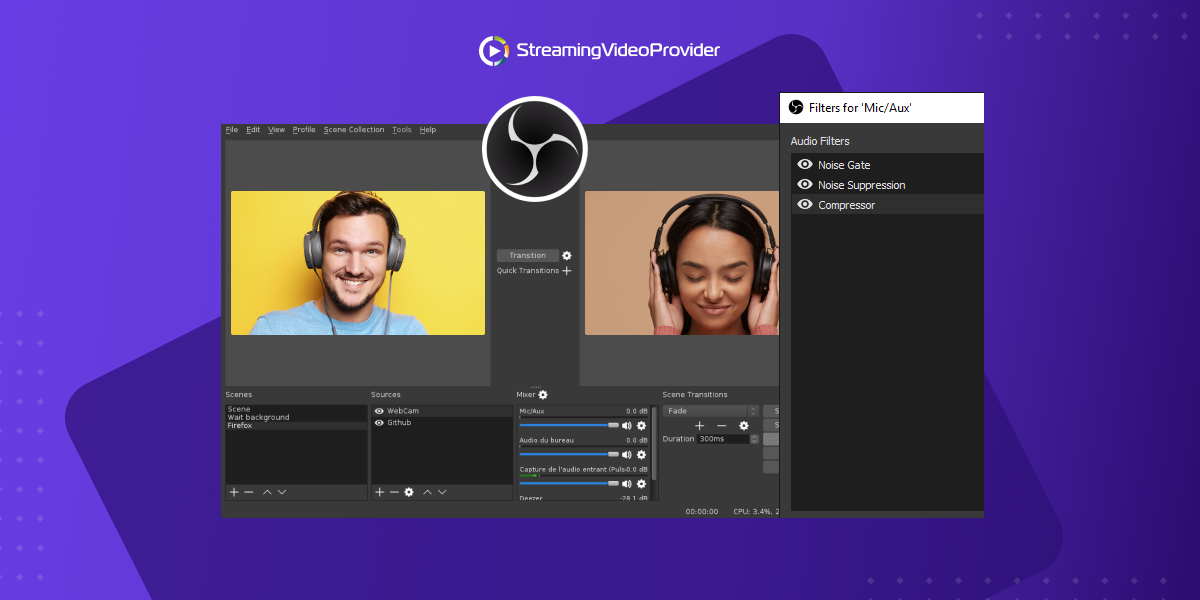
OBS Noise Gate
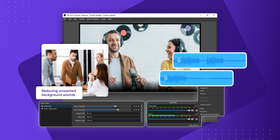
The noise gate in OBS is handy for reducing unwanted background sounds like noise from keyboards or nearby conversations. If you’re wondering how to use noise gates in your stream, it is very simple.
When you have your noise gate configured correctly, there should be no visible input detected by your microphone while you are silent. This means that the closing threshold is activated, and it is reducing the unwanted sounds.
Now, let’s talk about how to set up noise gate OBS settings! These Open and Close threshold settings will be a good starting point for you to work from.
When you open the noise gate setting in OBS, you will notice two sections that are listed below:
Open threshold — Input reaching this level will be unmuted (start with -26.00dB)
Close threshold — Input that falls below the threshold will be muted (start with -32.00dB)
These threshold settings will be different for everyone, but the above is a good starting point for most streamers. These are our OBS best noise gate settings, but yours may be different depending on the hardware you use.
OBS Compressor
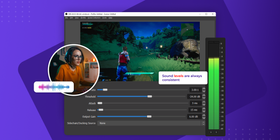
Have you ever watched a stream and noticed that the sound levels are always consistent, even when someone is shouting? That is the compressor working its magic!
This is an essential OBS microphone filter to configure. It allows for a more consistent and professional-sounding broadcast.
There are many compressor settings. These range from choosing the amount of compression applied to your microphone to how quickly the compressor deactivates.
OBS Noise Suppression
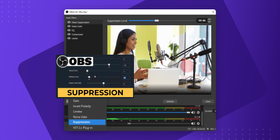
Working together with the noise gate, the noise suppression OBS setting allows you to eliminate even more background sounds from your broadcast. In OBS Studio, you will also have the option to use either Speex or RNNoise under the ‘method’ section. It’s best to try both of these to see which you prefer. Start with Speex.
When configuring this in OBS, you will also notice a setting named Suppression Level. We recommend starting with a setting of around -30dB. Experiment around to find what works best for your equipment.
OBS Gain
This is one of the settings that doesn’t require much tweaking or explanation. The OBS gain setting is used to either boost volume from your microphone (gain) or reduce it.
Common OBS Noise Problems And How To Solve Them
Common Problems | Equipment Solution | Software Solution | Environment |
Background Noise | Microphone with cardioid/appropriate polar pattern | Configure OBS noise suppression settings and noise gate | Soundproofing – acoustic insulation and soundproof boards |
Weak Microphone Levels | Check configuration and ensure physical dials are turned up sufficiently | Try adding more gain within OBS and temporarily disable other OBS filters | Ensure that your mic is placed the optimal distance from you (6-12 inches) |
Distorted Input from Microphone | Attach a pop shield and/or reposition your microphone further away | Lower gain settings and configure the OBS compressor | Try to stop wind or indoor fans from interfering with the microphone |
Unwanted Keyboard Sounds | The use of a shock mount helps this by minimizing vibration | Use OBS noise suppression and noise gate filter | Adjust the shock mount and mic positioning |
FAQs
Microphones can distort for a number of different reasons. The best place to start is by checking the distance your microphone is from you. Also, ensure that your OBS filters are configured correctly.
You can reduce the gain setting within OBS if you find there is too much by default.
If you are streaming in an outdoor environment, keep in mind that some microphones are susceptible to distortion when exposed to wind.
A solution to this problem would be to purchase a windshield if you often stream in challenging environments.
Configuring the noise gate and noise suppression filters within OBS are both great ways to eliminate or reduce background noise. When first setting this up, it will need a bit of tweaking. Once configured, your mic quality will improve greatly.
If background noise is interfering with your broadcast from outside your building, you can look to soundproof your streaming space. This will prevent your equipment from capturing unwanted noise in the first place.
Switching to a microphone with a cardioid polar pattern can also significantly reduce background sounds from noisy environments.
Cardioid patterns are sensitive to sound coming in directly in front of the microphone and have no sensitivity from behind.
The best settings for your mic within OBS really depend on your hardware and setup. The settings below are a great starting point that you can work from to get your microphone sound to its best:
Noise Gate
- Open: -26.00dB
- Closed: -32.00dB
- Attack Time: 25ms
- Hold Time: 200ms
- Release Time: 150ms
Noise Suppression
- Suppression Level (-30dB)
Compressor
- Ratio: 3.00:1
- Threshold: -18.00dB
- Attack: 1ms
- Release: 60ms
- Output Gain: 9.00dB
Gain
- Start the Gain filter from 0dB and increase or decrease as required.
To get your microphone to sound professional, configure all of the OBS filters we listed above.
It may also be a good idea to invest in accessories like shock mounts and pop shields. Be sure to choose the correct polar pattern based on the type of content you are making.
Another option is to look into upgrading to an XLR microphone. These mics are for those that really want the best when it comes to sound quality.
Conclusion
Although the majority of your audience will be watching your broadcast, some will have your stream minimized while doing something else. This is another reason why your sound is so important. You’d want the viewers that only listen to your content to perceive it as professional.
Today, most streamers have a high production quality that sometimes rivals that of TV studios. So, you have to be able to compete in this area if you want your stream to become a success.
To summarize, here are the main things to consider when looking to improve your mic’s quality on stream:
- Choose the right hardware for your use case
- Use the correct polar pattern for your environment
- Configure all OBS filters correctly
- Soundproof your studio or streaming space
- Buy accessories like mounts, filters, and windshields
Configuring your OBS noise gate settings only takes a few seconds, but the effect is immediate and amazing.
We hope that, after reading this article, you will find it easier to set up your OBS Studio noise reduction filters. Once you have finished tweaking your OBS audio filter settings, your stream will sound a lot better to your audience watching.
References & Further Reading
- The Best OBS Settings for Streaming Professionally
- How to Choose the Right Microphone Polar Pattern
- How to Add An Overlay to OBS
- The Best Live Streaming Software
- How to Set up OBS From A to Z

You can stream Pay Per View with NO fees
Try It Free


![[How To] Set up OBS From A To Z](https://www.streamingvideoprovider.co.uk/assets_dist/svp/img/blog-img/how-to-set-up-use-obs/how-to-set-up-obs-tutorial.png)


DON’T MISS OUT
Get updates on new articles, webinars and other opportunities: